

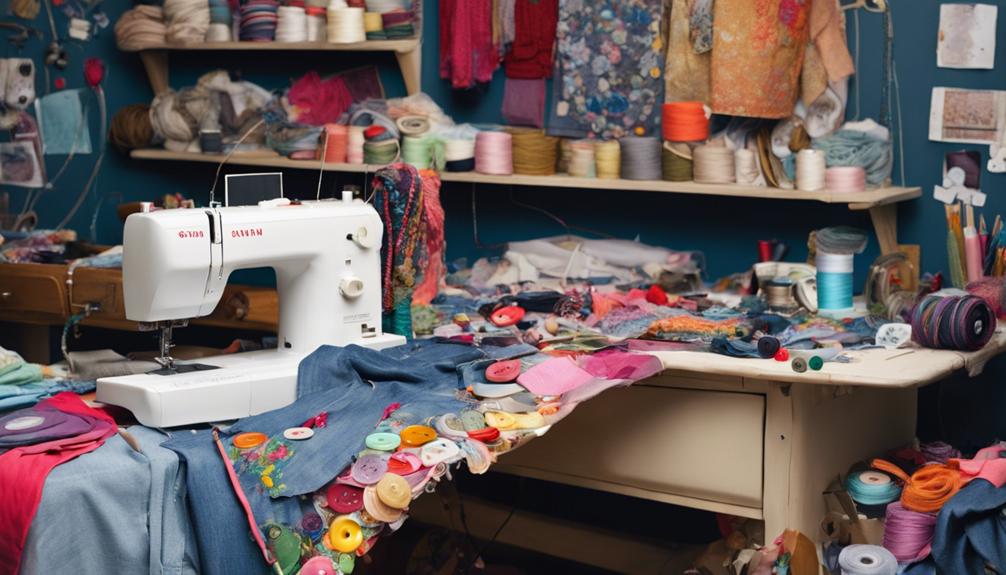
Transform your wardrobe with these clever DIY fashion hacks. Upcycle old t-shirts into trendy tank tops, revamp jeans into stylish shorts, and give old shoes a bold makeover. Turn vintage brooches into statement piece necklaces and breathe new life into old sweaters by repurposing them into cozy hats. With a few simple adjustments, you can discover a fresh, on-trend style without breaking the bank. From restyling old dresses into skirts to turning scarves into chic belts, the possibilities are endless. And, with a little creativity, your old favorites can become new wardrobe staples, waiting to be rediscovered.
Upcycle Old T-Shirts Into Tanks
Transforming old t-shirts into trendy tank tops is a simple yet effective way to breathe new life into your wardrobe staples and reduce textile waste. This DIY hack not only saves you money but also allows you to give a second chance to a piece of clothing that would have otherwise ended up in a landfill. With a few simple steps, you can create a stylish and comfortable tank top that's perfect for warm weather or layering under your favorite cardigans.
To start, gather your old t-shirts and identify the most flattering silhouettes and colors. Choose the ones that fit well and have a soft, comfortable fabric. Next, lay the t-shirt flat on a surface and use a ruler or measuring tape to mark the armhole and hemlines. Cut along the marked lines, making sure to leave a 1/4 inch seam allowance. Turn the shirt inside out and sew along the edges to create a clean finish.
Add some embellishments like lace, ribbons, or appliques to give your tank top a personalized touch. You can also experiment with different necklines, such as a scoop or V-neck, to add some visual interest. With a little creativity and some basic sewing skills, you can upcycle your old t-shirts into trendy tank tops that are perfect for any occasion. This eco-friendly fashion hack is not only sustainable but also allows you to express your personal style and creativity.
Revamp Jeans Into Shorts
When transforming jeans into shorts, it's crucial to take into account a few key factors to guarantee a successful and stylish outcome. First, attention must be given to the cutting of the hemline, as a clean and even cut can make all the difference in the overall appearance of the shorts. Additionally, understanding how to properly care for denim fabric and incorporating summer style essentials will elevate your revamped shorts from basic to brilliant.
Cutting the Hemline
To revamp jeans into shorts, an important step is to meticulously cut the hemline, allowing you to create a fresh, stylish pair of shorts from a pair of outdated jeans. This transformation requires precision and patience, as a well-executed cut can make all the difference in the final result. When cutting the hemline, consider the length and style you desire for your shorts. A higher cut will create a more trendy, fashion-forward look, while a lower cut will result in a more relaxed, casual style. Use sharp scissors or a rotary cutter to guarantee a clean, straight cut. To avoid fraying, cut the hemline about 1/4 inch above the desired length, and then fold and press the raw edge to create a crisp crease. This will give your shorts a professional finish and prevent the fabric from unraveling. By carefully cutting the hemline, you'll be one step closer to creating a unique, one-of-a-kind pair of shorts that reflect your personal style.
Denim Fabric Care
With the hemline cut and finished, attention turns to the denim fabric itself, which demands special care to guarantee the revamped shorts remain vibrant and durable. To prevent fading and shrinkage, wash your denim shorts inside out in cold water using a mild detergent. Avoid using bleach or harsh chemicals, as they can weaken the fabric and cause discoloration. For tough stains, spot clean with a gentle stain remover or white vinegar.
To maintain the fabric's texture and prevent wrinkles, avoid using fabric softener and dryer sheets. Instead, hang your shorts to air dry or tumble dry on a low heat setting. Ironing while still slightly damp can help remove wrinkles and creases. For a more distressed look, try freezing your shorts before washing to create a unique, frayed effect. By following these simple care instructions, you'll be able to enjoy your revamped shorts for seasons to come, while maintaining their vibrant color and durability.
Summer Style Essentials
Regularly, a staple of summer style is a reliable pair of shorts, and revamping old jeans into trendy shorts is a clever way to update your wardrobe while reducing waste. This DIY hack not only breathes new life into old favorites but also allows you to customize the fit and style to your liking. To get started, gather a pair of well-worn jeans, a pair of scissors, and a sewing machine. Begin by trying on the jeans and marking the desired length with a pin or marker. Next, carefully cut along the marked line, taking care not to cut too much fabric at once. Once you've achieved the desired length, use a sewing machine to hem the raw edges, folding the fabric inward to create a crisp fold. Finally, add any embellishments, such as studs or patches, to give your new shorts a personalized touch. With a little creativity and some basic sewing skills, you'll be rocking stylish, eco-friendly shorts in no time.
Create a Statement Piece Necklace
Elevate your accessories game by repurposing vintage brooches, chunky chain belts, or even an old pearl necklace to craft a show-stopping statement piece that makes a bold fashion statement. With a little creativity, you can transform outdated treasures into a one-of-a-kind necklace that adds a touch of sophistication to any outfit. Consider layering these unique pieces with modern accessories for a striking contrast that captures attention. Experiment with different textures and colors to discover how to elevate your outfit, making even the simplest attire feel curated and stylish. By bringing new life to these vintage finds, you’ll not only stand out but also embrace sustainable fashion principles that are kind to the planet.
Start by selecting the base of your necklace. This could be a vintage brooch, a chunky chain belt, or even an old pearl necklace. Next, gather any additional embellishments you'd like to add, such as beads, sequins, or charms. Consider the overall aesthetic you're aiming for – bohemian, elegant, or edgy – and choose your embellishments accordingly.
Using a hot glue gun or jewelry adhesive, attach your embellishments to the base of your necklace. Experiment with different textures, colors, and shapes to create visual interest. For a more dramatic look, try layering different elements or adding a statement charm. To add an extra touch of glamour, consider adding a few strategically placed rhinestones or crystals.
The beauty of creating your own statement piece necklace lies in its uniqueness. You can tailor it to your personal style, experimenting with different materials and aesthetics until you've crafted a true showstopper. Whether you're dressing up or dressing down, a bold, eye-catching necklace has the power to elevate even the simplest of outfits, making it a must-have accessory for any fashion enthusiast.
Give Old Shoes a Makeover
Breathing new life into old shoes can be a fun and creative way to refresh your wardrobe without breaking the bank. With a few simple DIY hacks, you can transform your tired, worn-out shoes into stylish and trendy footwear that complements your personal style.
One of the easiest ways to give your shoes a makeover is to paint them. Yes, you read that right! Acrylic or fabric paint can work wonders on old shoes. Simply clean the shoes, apply a coat of primer, and let your creativity shine by painting unique designs, patterns, or colors. You can also add embellishments like glitter, rhinestones, or studs to give your shoes an extra oomph.
Another great way to revamp your shoes is to change the laces or straps. Replace plain laces with colorful or patterned ones, or swap out worn-out straps with new ones made from leather, suede, or fabric. You can also add charms, tassels, or other decorative elements to give your shoes a personalized touch.
Lastly, consider adding a fabric or ribbon wrap around the heel or toe of your shoes. This can add a pop of color and texture, and instantly elevate your shoe game. With a little creativity and some basic crafting skills, you can breathe new life into your old shoes and make them look like new again.
Turn Old Sweaters Into Hats
As you refresh your shoe wardrobe, consider repurposing old sweaters to create unique and cozy hats that can add a stylish touch to your winter outfits. Upcycling old sweaters into hats is a great way to breathe new life into your wardrobe while reducing waste. With a few simple steps, you can transform an outdated sweater into a trendy and functional accessory.
To get started, choose a sweater made from a thick, high-quality yarn that will hold its shape when transformed into a hat. Look for sweaters with interesting textures, colors, or patterns to add visual interest to your hat. Next, carefully disassemble the sweater, taking note of the seams and any embellishments you'd like to salvage. Use a hat pattern or create your own template to guide your cutting. Cut out the hat shape, leaving a 1/4-inch seam allowance around the edges.
Sew the hat pieces together, leaving a small opening to turn the hat right side out. Turn the hat right side out, and press the seams to create a crisp fold. Topstitch the edges for a finished look, and add any embellishments you salvaged from the original sweater. With your new hat, add a touch of handmade charm to your winter outfits. This innovative DIY project is a great way to refresh your wardrobe without breaking the bank, and the result is a one-of-a-kind accessory that's sure to turn heads.
DIY Embellishments for Plain Tees
Transform a plain white tee into a statement piece with creative DIY embellishments that add a personal touch to your wardrobe. With a few simple materials and some imagination, you can elevate a basic tee from bland to grand. One easy way to start is by adding rhinestones or sequins to create a bold, eye-catching design. You can arrange them in a pattern or scatter them randomly for a more whimsical look.
Another option is to use fabric paint or markers to create unique designs, from abstract patterns to inspirational quotes. You can also add appliques, such as fabric flowers or leaves, to give your tee a more textured, dimensional look. For a more edgy vibe, try adding studs or spikes to create a tough, avant-garde aesthetic.
Embellishments can also be used to update an old favorite tee that's seen better days. Add some new buttons, patches, or even a brooch to breathe new life into a tired design. The best part? These DIY embellishments are easy to create and require minimal sewing or crafting expertise. With a little creativity, you can transform a plain tee into a one-of-a-kind masterpiece that reflects your unique style and personality. So why settle for ordinary when you can create an extraordinary wardrobe with DIY embellishments?
Transform Old Bags Into Clutches
With a similar spirit of creative reinvention, an old, worn-out bag can be reborn as a stylish clutch with a few clever alterations. This DIY hack is a great way to breathe new life into a tired accessory and reduce waste in the process. To start, carefully disassemble the bag, removing any excess fabric, straps, or hardware. Next, cut out the usable parts of the bag, such as the main body or a decorative panel, and set them aside.
Using a hot glue gun, attach a new lining to the inside of the bag, ensuring a clean and polished finish. For a more luxurious look, add a layer of interfacing or fusible web to give the clutch some structure and stability. To create a sleek and modern silhouette, trim the edges of the bag with a contrasting fabric or ribbon, adding a touch of visual interest.
To complete the transformation, attach a new closure, such as a magnetic snap or a zipper, and add a stylish strap or chain. Finally, embellish the clutch with some decorative hardware or a brooch to give it a unique personality. With these simple steps, an old bag can be transformed into a chic and modern clutch, perfect for a night out on the town or a special occasion. By upcycling an old bag, you'll not only reduce waste but also create a one-of-a-kind accessory that showcases your creativity and style.
Restyle Old Dresses Into Skirts
When it comes to restyling old dresses into skirts, there are several creative opportunities waiting to be explored. One approach is to upcycle old favorites, giving new life to dresses that may have been relegated to the back of the closet. By applying simple hemline hacks, it's possible to transform a dress into a stylish skirt that's perfect for a night out or everyday wear.
Upcycle Old Favorites
Revitalizing old favorites can breathe new life into your wardrobe, allowing you to rediscover hidden gems and reduce waste in the process. One innovative way to do this is by upcycling old dresses into trendy skirts. Start by selecting a dress that has a flattering silhouette but may be outdated or no longer worn. Next, identify the most flattering section of the dress, whether it's the bodice, sleeves, or hem. Use a seam ripper to carefully disassemble the dress, preserving the sections you want to repurpose.
Once you have your desired pieces, get creative with reconstruction. You can reattach the bodice to a flowy maxi skirt, or transform the sleeves into a statement piece. Add some embellishments, such as sequins or ruffles, to give your new skirt a modern twist. With a little imagination and some basic sewing skills, you can turn an old dress into a one-of-a-kind skirt that's both sustainable and stylish. By upcycling your old dresses, you'll not only reduce waste but also inject new life into your wardrobe.
Hemline Hacks
By repurposing the hemline of an old dress, you can create a stylish skirt that not only reduces waste but also adds a fresh touch to your wardrobe. This DIY hack is perfect for those who want to breathe new life into their old dresses without sacrificing their favorite pieces. Start by identifying the most flattering length for your skirt, taking into account your personal style and body type. Next, carefully cut the dress at the desired length, making sure to leave a 1-2 inch hem allowance. Finish the raw edge with a serger or zigzag stitch to prevent fraying. Finally, add any embellishments or accessories you like, such as a new waistband or belt, to give your skirt a personalized touch. With a little creativity and some basic sewing skills, you can transform an outdated dress into a trendy skirt that's perfect for any occasion.
Make a Scarf Into a Belt
Transforming a scarf into a belt is a simple yet effective way to breathe new life into an old accessory. With a few easy steps, you can give your wardrobe a fresh twist and add a stylish touch to your outfit. This DIY hack is perfect for those who love experimenting with fashion and want to stand out from the crowd.
To start, choose a scarf that complements your personal style and the outfit you want to pair it with. Look for lightweight fabrics like silk, cotton, or voile that will drape comfortably around your waist. Next, fold the scarf into a thin strip, making sure the edges are aligned and the fabric is smooth. You can use a simple knot or a more intricate bow to secure the scarf around your waist.
The beauty of this hack lies in its versatility. You can wear the scarf-belt over a dress, a tunic, or even a pair of high-waisted pants. Experiment with different knots and styles to create a look that's uniquely yours. For a more polished look, pair the scarf-belt with a statement jacket or a bold piece of jewelry. With this DIY hack, you'll be surprised at how easily you can elevate your style and add a touch of sophistication to your wardrobe. So, go ahead and give your old scarf a new lease on life – your wardrobe will thank you!
Breathe New Life Into Old Socks
Old socks, once relegated to the back of the drawer, can be repurposed into a variety of creative and functional items with a little imagination and some basic crafting skills. Instead of throwing them away, why not breathe new life into them? With a few simple DIY techniques, you can transform your old socks into unique and useful items that will make you wonder how you ever lived without them.
Here are some creative ways to repurpose your old socks:
- Sock Yarn: Cut the socks into strips and use them as yarn for knitting or crocheting. You can create unique accessories like hats, scarves, or bags.
- Dusting Pads: Turn your old socks into reusable dusting pads by filling them with cotton balls or polyester fiberfill. They're perfect for dusting delicate surfaces or hard-to-reach areas.
- Plant Covers: Use old socks as covers for small plants or seedlings. They provide protection from frost and other harsh weather conditions.
- Pincushions: Fill the toes of old socks with polyester fiberfill and use them as pincushions. They're a great way to keep your workspace organized and your pins within reach.
- Cleaning Rags: Cut the socks into smaller pieces and use them as cleaning rags for wiping down surfaces or cleaning up spills.
Frequently Asked Questions
Can I Use a Sewing Machine for All DIY Fashion Projects?
While a sewing machine can be an invaluable tool for various DIY projects, it's not always necessary for every DIY fashion endeavor. Depending on the complexity and scope of the project, hand-stitching or other techniques may be more suitable. Consider the type of fabric, desired outcome, and level of precision required to determine whether a sewing machine is truly essential or if alternative methods would be more effective.
How Do I Prevent Fraying on Cut Fabric Edges?
To prevent fraying on cut fabric edges, several techniques can be employed. One method is to use a serger or overlock machine, which trims and encases the edge in a single step. Alternatively, applying a fabric finisher or fray preventer to the cut edge can help prevent fraying. Additionally, using a zigzag stitch or a binding technique with ribbon or tape can also effectively prevent fraying.
Are There Any Safety Precautions for Working With Hot Glue Guns?
When working with hot glue guns, safety precautions are paramount to prevent injuries and guarantee a successful project outcome. Always handle the gun with care, avoiding loose clothing or jewelry that may catch fire. Wear protective gear, including heat-resistant gloves and safety glasses. Keep the work area well-ventilated and clear of flammable materials. Avoid touching the nozzle or hot glue, and unplug the gun when not in use to prevent accidental start-ups.
Can I Use Fabric Dye on Synthetic or Blended Fabrics?
As we explore the world of fabric manipulation, an important question arises: can fabric dye tame the unruly synthetic and blended fabrics? The answer lies in the nuances of chemical bonding. While some synthetic fibers can be dyed, others resist color absorption. Blended fabrics pose a unique challenge, as their composition affects dye uptake. It's essential to research the specific fiber content and dye type to guarantee a successful, vibrant transformation.
What Is the Best Way to Clean and Prepare Second-Hand Items?
When it comes to cleaning and preparing second-hand items, a gentle approach is key. Start by inspecting the garment for stains and spots, then pre-treat them with a mild detergent. Hand wash or machine wash on a delicate cycle using cold water. Avoid using harsh chemicals or bleach, as they can damage the fabric. Air dry or tumble dry on a low heat setting to prevent shrinkage. This careful cleaning process will help preserve the integrity of the fabric and extend the life of your second-hand finds.
